Kubernetes | How to Implement Horizontal Pod Autoscaler (HPA) for an ASP.NET Core App in Kubernetes
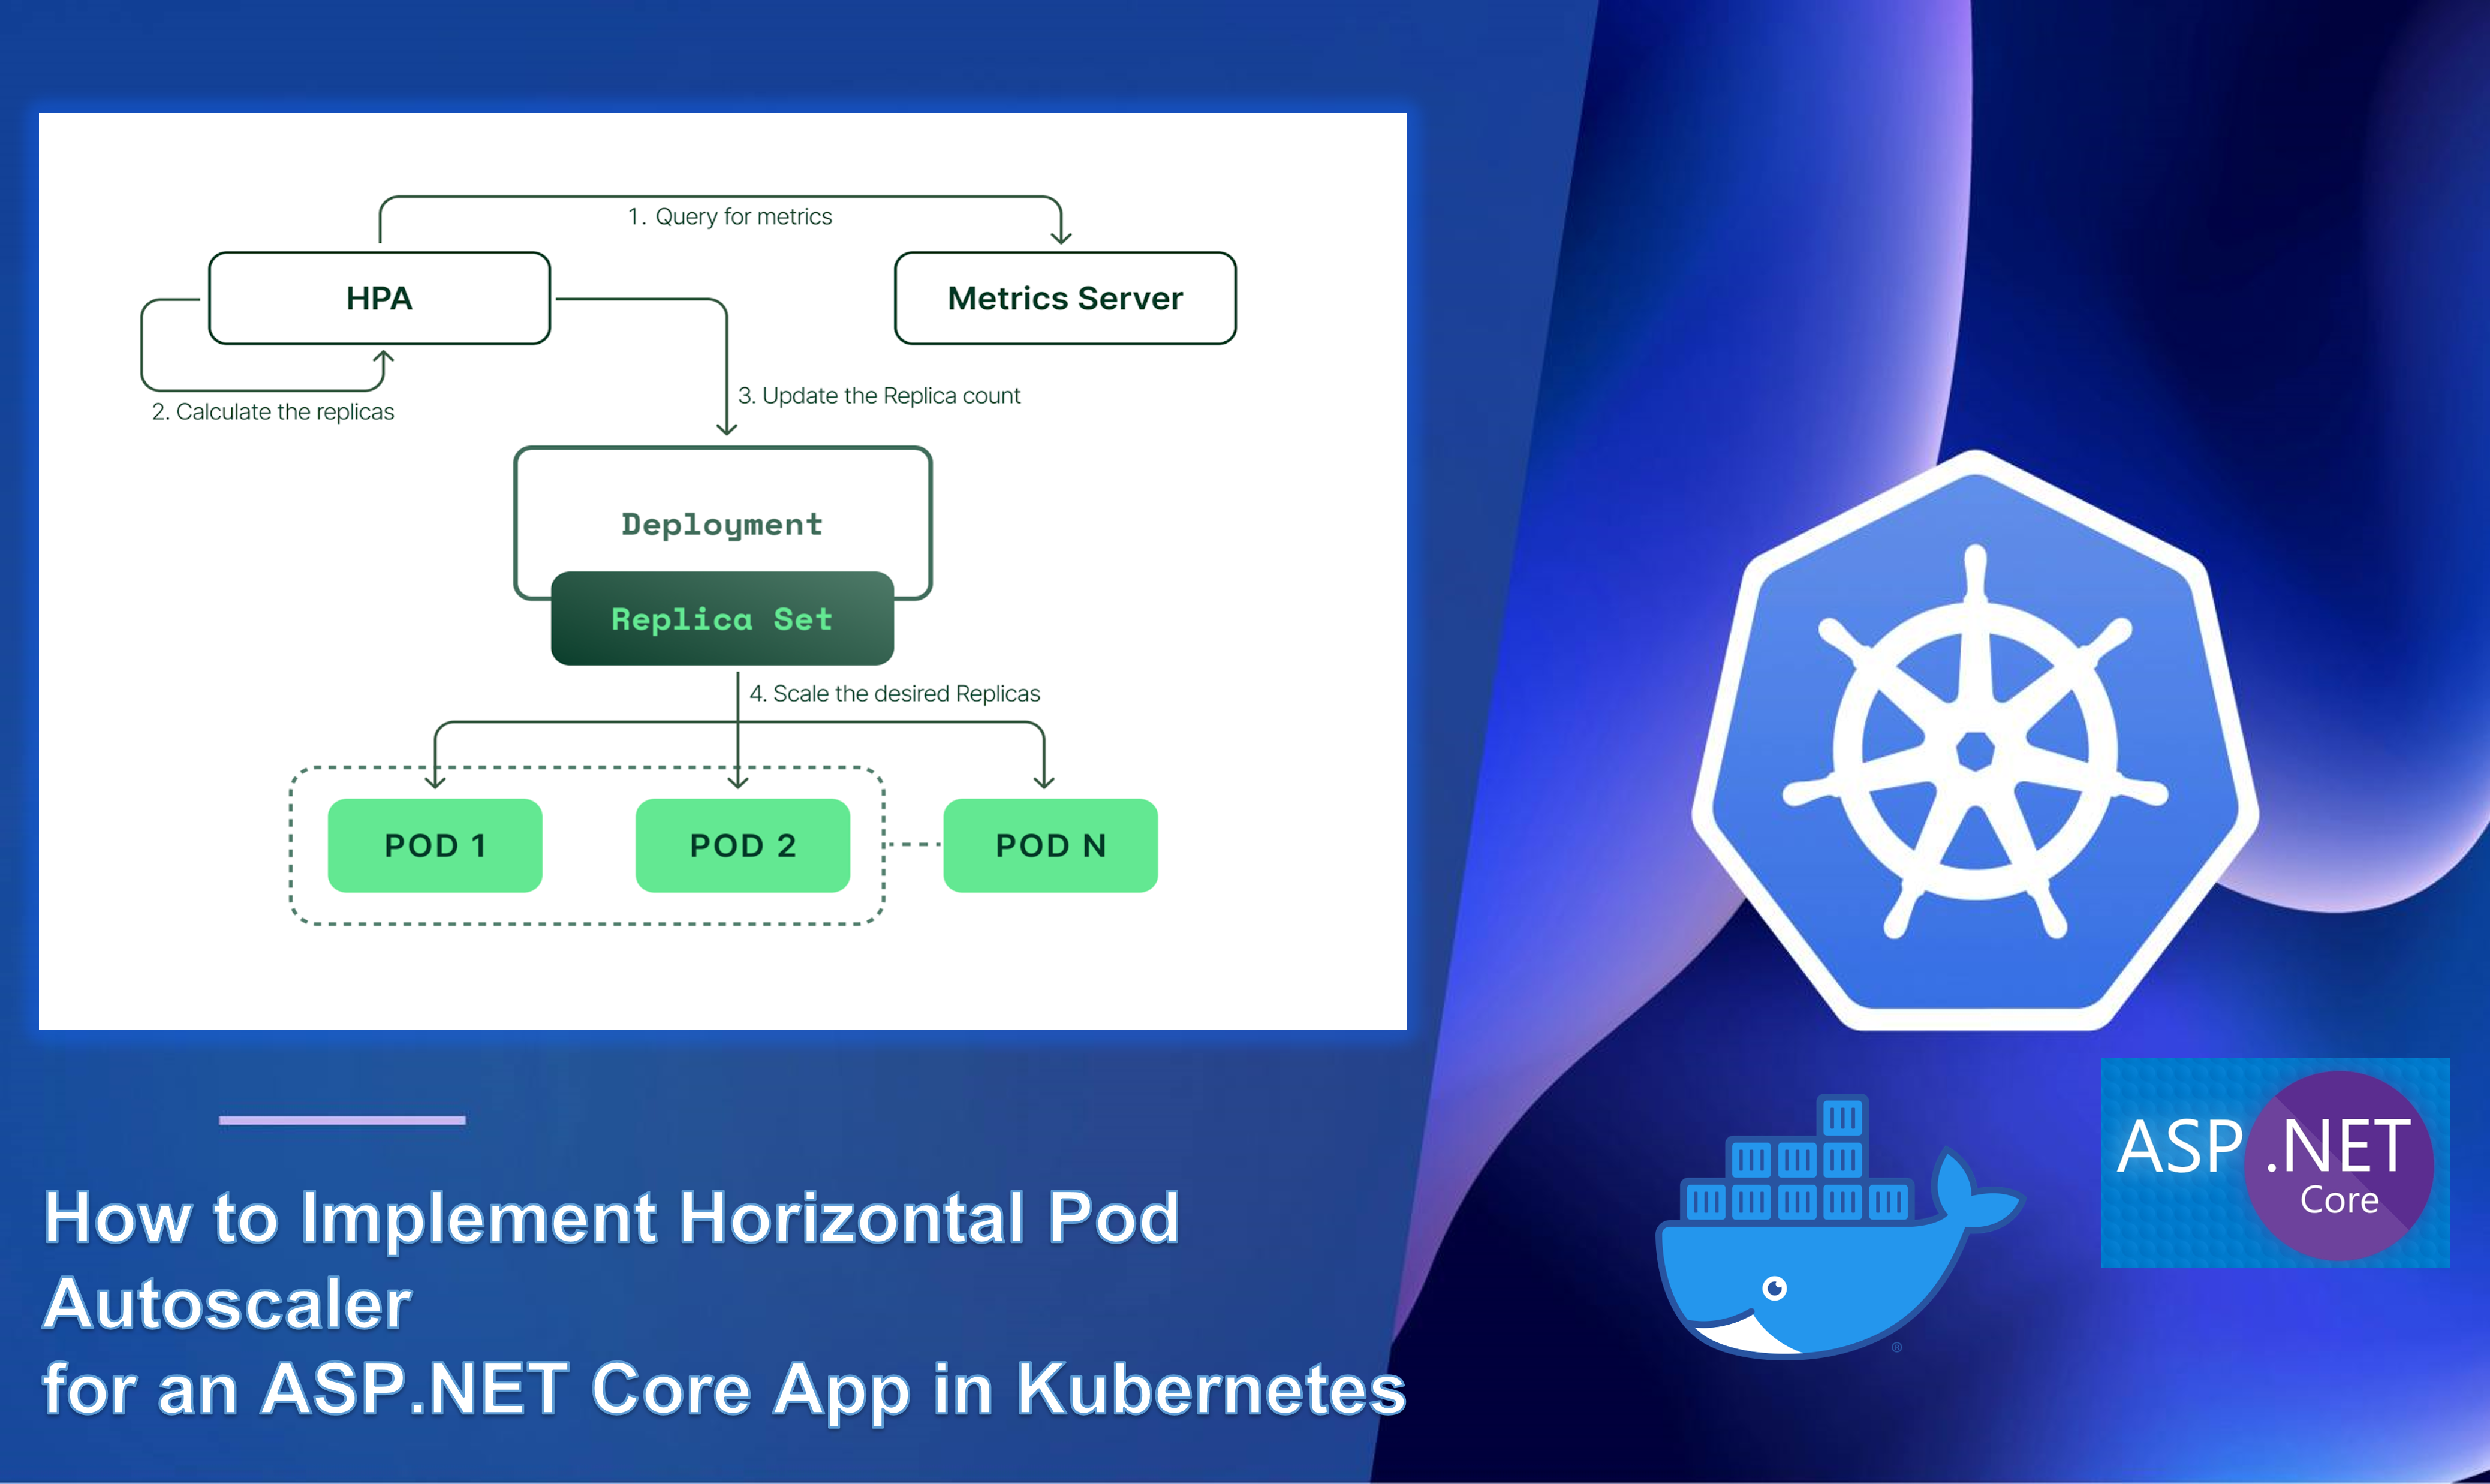
This guide walks you through deploying an ASP.NET Core app on Kubernetes with Horizontal Pod Autoscaler (HPA) configured for autoscaling based on CPU and memory thresholds. All configurations are provided in YAML with comments for clarity.
The solution was implemented on a Kubernetes cluster running locally on Windows 11 Pro.
You can find the Kubernetes configuration files in my GitHub repository here.
To access the Kubernetes Dashboard locally, refer to the following post.
1. Pull the ASP.NET Core Image and Test Locally
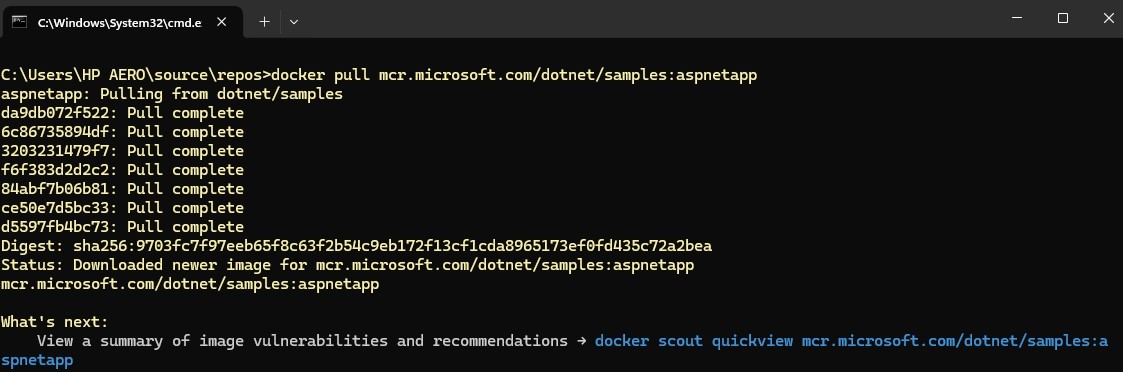
You can pull a sample ASP.NET Core web app image directly from Microsoft:
1
docker pull mcr.microsoft.com/dotnet/samples:aspnetapp
Run the container to test it:
1
docker run -it --rm -p 8000:8080 --name aspnetcore_sample mcr.microsoft.com/dotnet/samples:aspnetapp
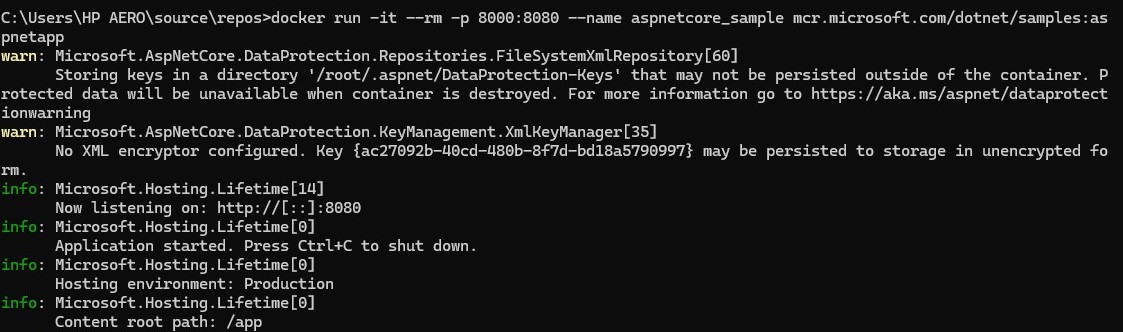
Access the app at http://localhost:8080.
2. Create Kubernetes Deployment
Define a Deployment to host the application, specifying resource requests and limits to enable HPA:
1
2
3
4
5
6
7
8
9
10
11
12
13
14
15
16
17
18
19
20
21
22
23
24
25
26
apiVersion: apps/v1
kind: Deployment
metadata:
  name: hbolajraf-webapp
spec:
  replicas: 1 # Initial pod count
  selector:
    matchLabels:
      app: hbolajraf-webapp
  template:
    metadata:
      labels:
        app: hbolajraf-webapp
    spec:
      containers:
      - name: hbolajraf-app-container
        image: mcr.microsoft.com/dotnet/samples:aspnetapp # ASP.NET Core app image
        ports:
        - containerPort: 8080
        resources:
          requests:
            memory: "128Mi"  # Minimum required memory
            cpu: "250m"      # Minimum required CPU
          limits:
            memory: "256Mi"  # Max memory
            cpu: "500m"      # Max CPU
Apply this Deployment:
1
kubectl apply -f deployment.yaml

3. Define the Horizontal Pod Autoscaler
Create an HPA to scale based on CPU and memory utilization. Note that we use autoscaling/v2 instead of v1 because it supports advanced scaling behaviors (behavior field) and multiple metrics e.g.(CPU, memory) for more granular and controlled autoscaling. v1 only supports a single resource metric, limiting flexibility:
1
2
3
4
5
6
7
8
9
10
11
12
13
14
15
16
17
18
19
20
21
22
23
24
25
26
27
28
29
30
31
32
33
34
apiVersion: autoscaling/v2
kind: HorizontalPodAutoscaler
metadata:
  name: hbolajraf-webapp-hpa
spec:
  scaleTargetRef:
    apiVersion: apps/v1
    kind: Deployment
    name: hbolajraf-webapp
  minReplicas: 1 # Minimum pods
  maxReplicas: 5 # Maximum pods
  metrics:
  - type: Resource
    resource:
      name: cpu
      target:
        type: Utilization
        averageUtilization: 70 # Target 70% CPU utilization
  - type: Resource
    resource:
      name: memory
      target:
        type: Utilization
        averageUtilization: 70 # Target 70% memory utilization
  behavior:
    scaleDown:
      stabilizationWindowSeconds: 60 # Prevent frequent scale-downs
      policies:
      - type: Pods
        value: 1
        periodSeconds: 60
      - type: Percent
        value: 40
        periodSeconds: 60
Apply the HPA configuration:
1
kubectl apply -f K8s_hpa.yaml

4. Expose the Deployment
Create a Service to expose your application:
1
2
3
4
5
6
7
8
9
10
11
12
apiVersion: v1
kind: Service
metadata:
  name: hbolajraf-webapp-service
spec:
  selector:
    app: hbolajraf-webapp
  ports:
  - protocol: TCP
    port: 80       # External access port
    targetPort: 8080 # Pod's container port
  type: ClusterIP
Apply the Service:
1
kubectl apply -f service.yaml

5. Configure Ingress for Domain Access
Set up an Ingress resource to access the application via a domain name:
1
2
3
4
5
6
7
8
9
10
11
12
13
14
15
16
17
18
apiVersion: networking.k8s.io/v1
kind: Ingress
metadata:
  name: hbolajraf-webapp-ingress
  annotations:
    nginx.ingress.kubernetes.io/rewrite-target: /
spec:
  rules:
  - host: hbolajraf-webapp.local # Custom domain
    http:
      paths:
      - path: /
        pathType: Prefix
        backend:
          service:
            name: hbolajraf-webapp-service
            port:
              number: 80
Apply the Ingress:
1
kubectl apply -f ingress.yaml
6. Configure /etc/hosts for Local Testing
Add the following line to your /etc/hosts file to route the custom domain to your local cluster:
1
127.0.0.1  hbolajraf-webapp.local
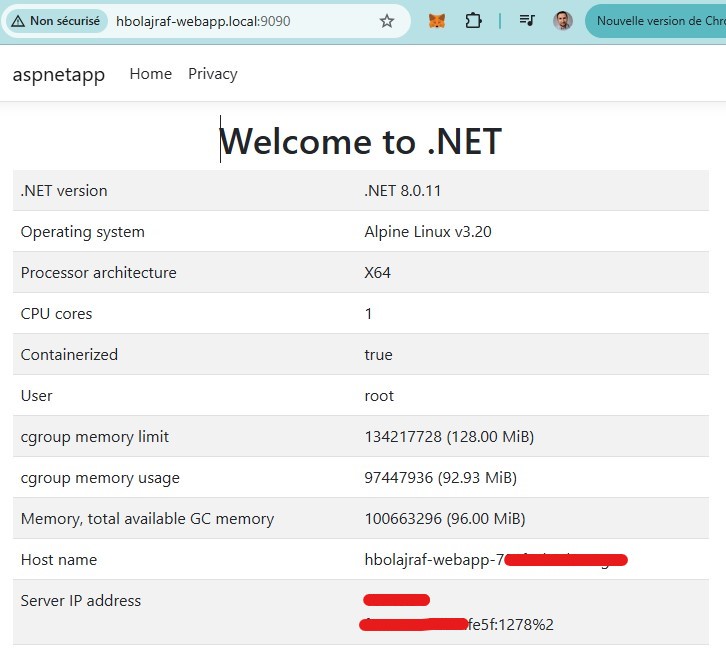
Accessing the Application unde our local cluster. If you’re using kubectl port-forward, forward port 8080 from the pod to your local machine:
1
kubectl port-forward svc/hbolajraf-webapp-service 9090:80

Now you can access the application on http://hbolajraf-webapp.local:9090.
7. Install and Configure Metrics Server
Ensure the Metrics Server is installed and running for the HPA to fetch resource metrics. Install it if not present:
1
kubectl apply -f https://github.com/kubernetes-sigs/metrics-server/releases/latest/download/components.yaml
Edit its deployment if needed to avoid TLS errors:
1
2
3
4
5
6
spec:
  containers:
  - name: metrics-server
    args:
    - --kubelet-insecure-tls
    - --kubelet-preferred-address-types=InternalIP
Ensure Kubernetes metrics server is running to update resource utilization promptly:
Run this command:
1
kubectl edit deployment metrics-server -n kube-system

8. Load Testing with hey
Simulate high load to test the HPA scaling behavior:
-
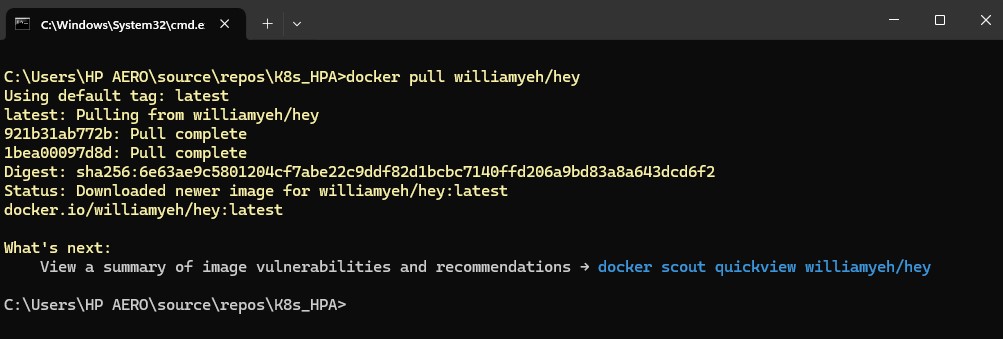
Pull the
heyDocker image:1
docker pull williamyeh/hey
-
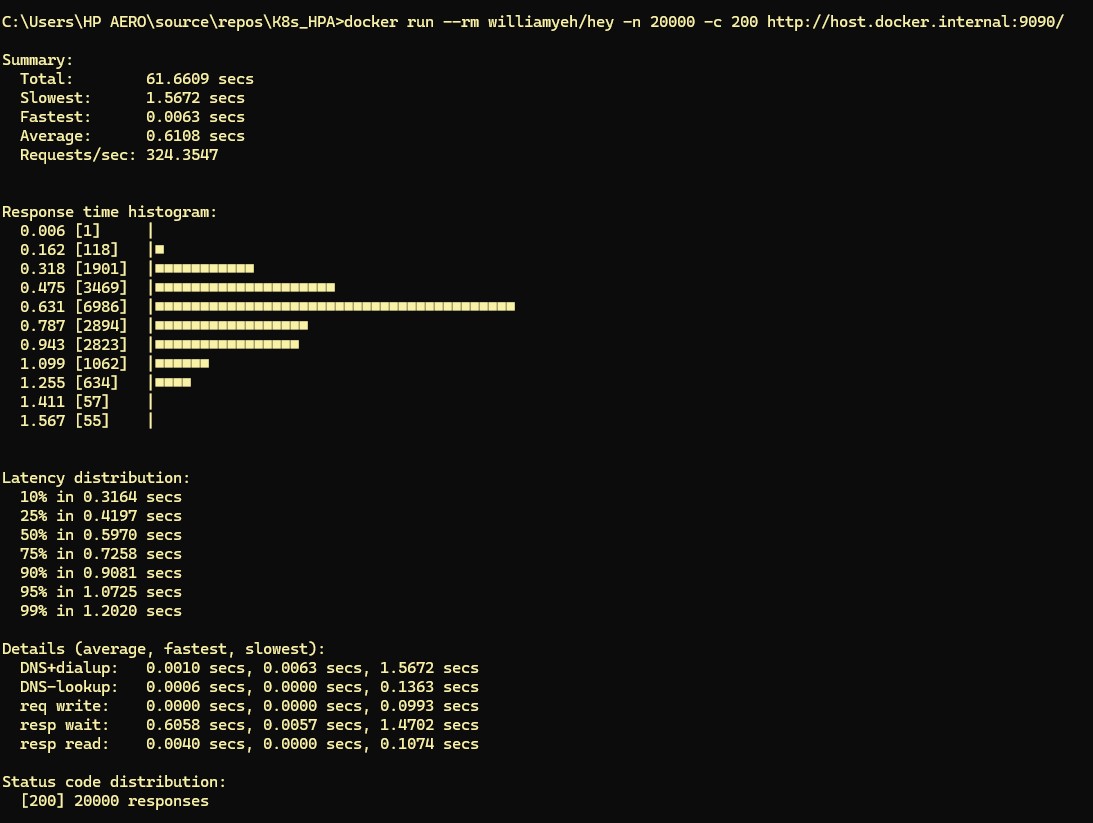
Run a load test:
1
docker run --rm williamyeh/hey -n 20000 -c 200 http://host.docker.internal:9090/
-
Monitor the scaling process:
1
kubectl get pods -w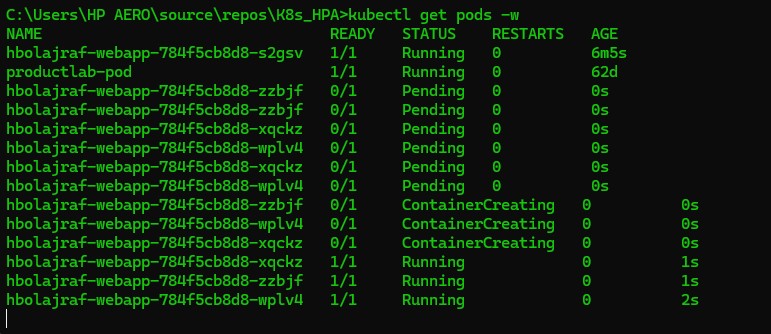
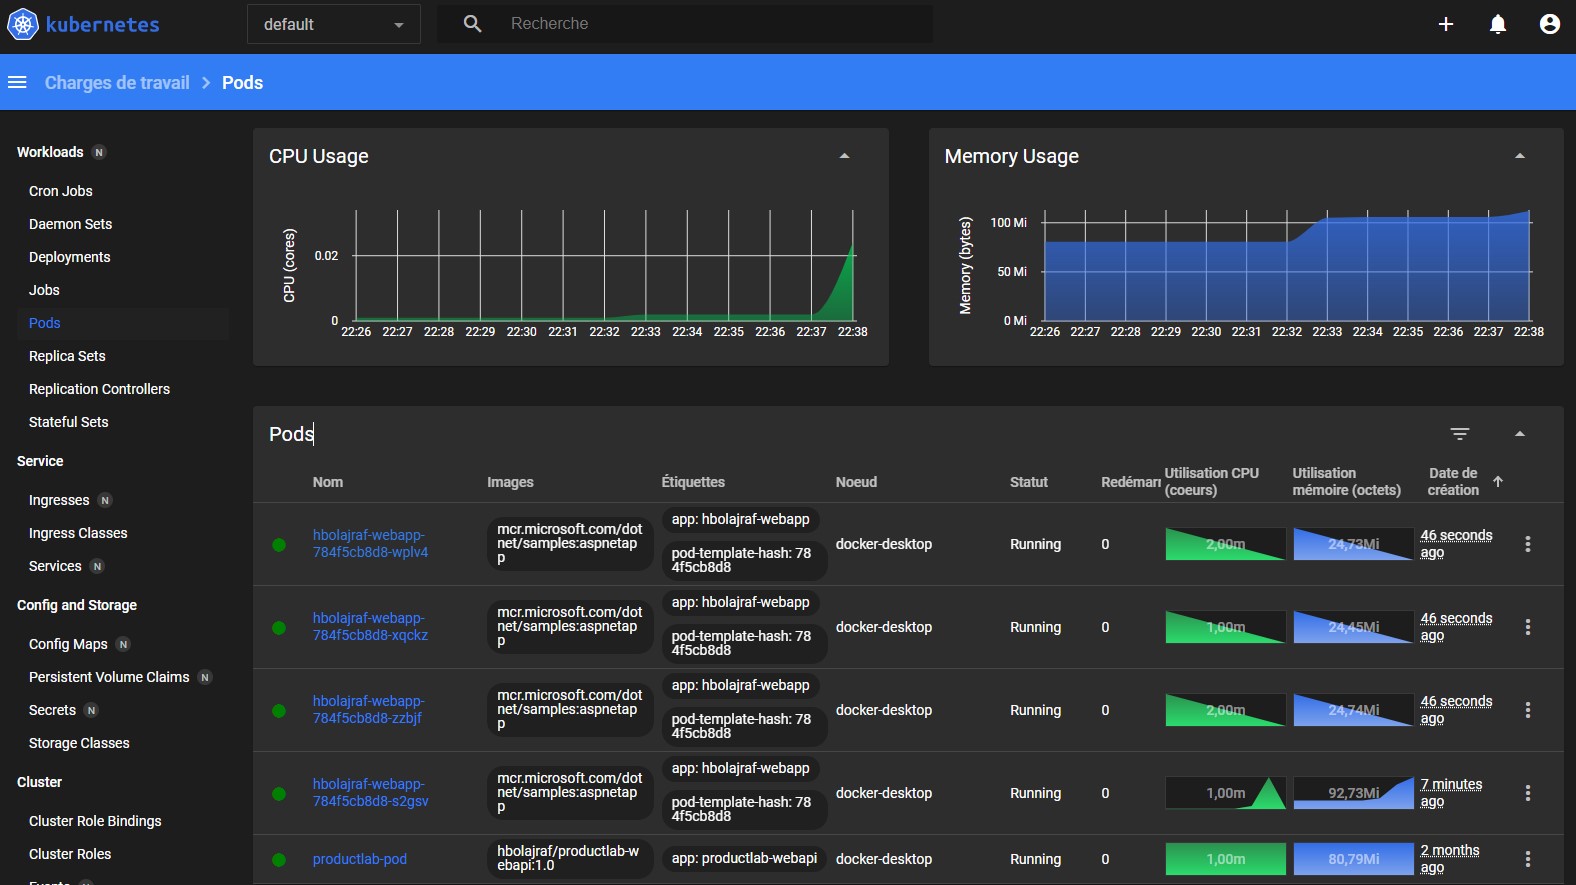
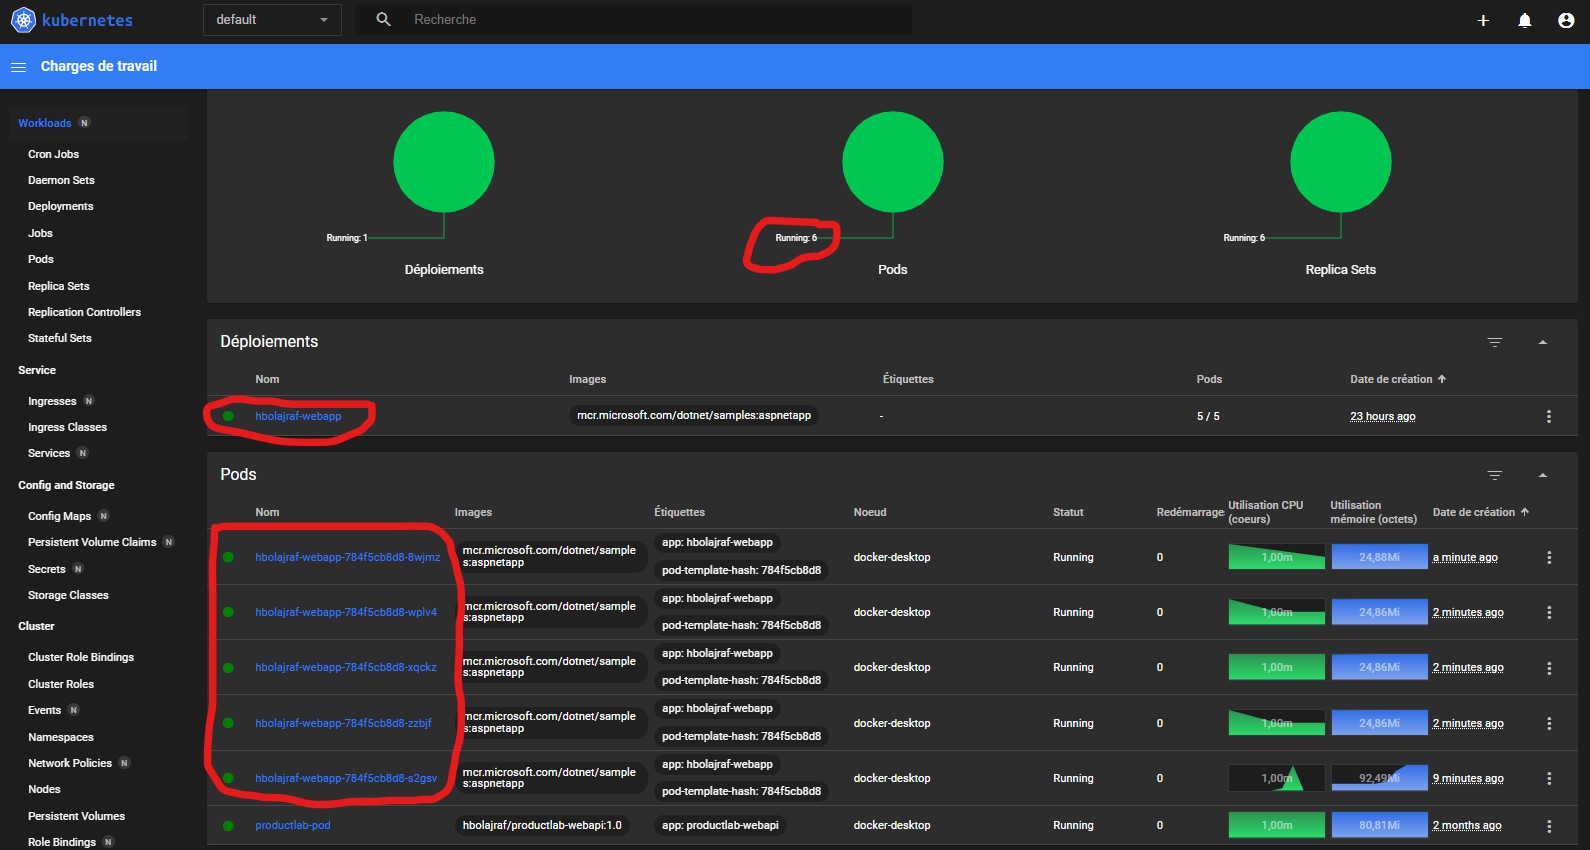
9. Access the Kubernetes Dashboard
Run the Kubernetes proxy to access the dashboard:
1
kubectl proxy
Navigate to the following URL:
1
http://localhost:8001/api/v1/namespaces/kubernetes-dashboard/services/https:kubernetes-dashboard:/proxy/#/login
10. Verify Autoscaling
Use the following command to check HPA and metrics:
1
kubectl get hpa

Summary
This guide provides the complete setup for deploying an ASP.NET Core app on Kubernetes with autoscaling capabilities. Use hey to simulate load and observe scaling behavior, and access the Kubernetes dashboard for further monitoring. This setup is perfect for local development and pre-production environments.