Kubernetes | Configure Kubernetes Single Node Cluster and Deploy an ASP.NET Core Application Using Docker Hub
Note I highlighted screenshots with a yellow color to focus on some important informations. You can download the C# solution from GitHub
Overview
Kubernetes is a powerful open-source container orchestration tool that simplifies the deployment, scaling, and management of containerized applications. Originally developed by Google, it’s now maintained by the Cloud Native Computing Foundation (CNCF). This guide walks you through setting up a single-node Kubernetes cluster and deploying an ASP.NET Core application using Docker Hub, without requiring a SQL Server database.
Tools and Technologies
- Visual Studio 2022
- Visual C#
- ASP.NET Core Web API
- Docker Desktop
Step 1: Install & Setup Hyper-V
Hyper-V provides a virtualized environment that allows Docker Desktop to run Linux containers on Windows smoothly and securely, making it a core requirement for Windows users running Docker. It’s essential for users who want stable, isolated, and high-performance containerized applications on their Windows system.
- Open Control Panel.
- On the left panel, click on Programs.
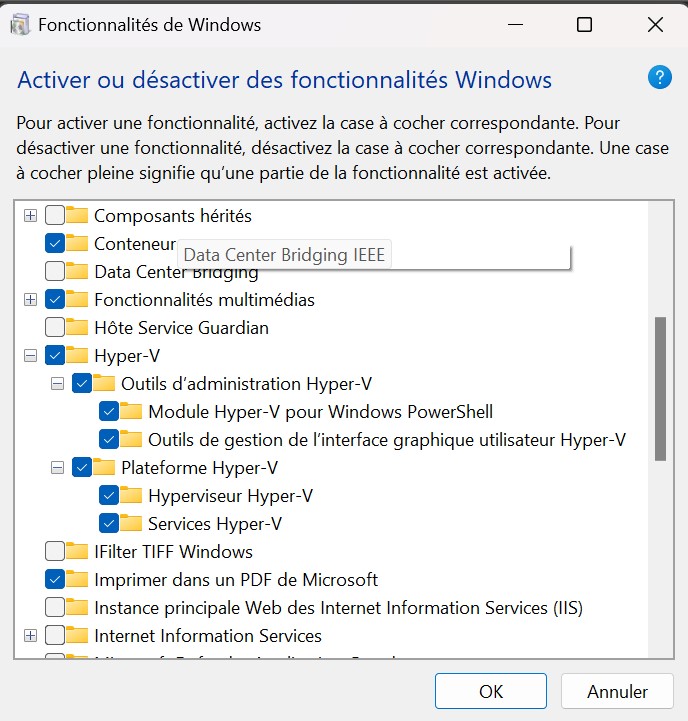
- Click Programs and Features, then Turn Windows features on or off.
- Check Hyper-V and Windows Hypervisor Platform.
- Click OK.
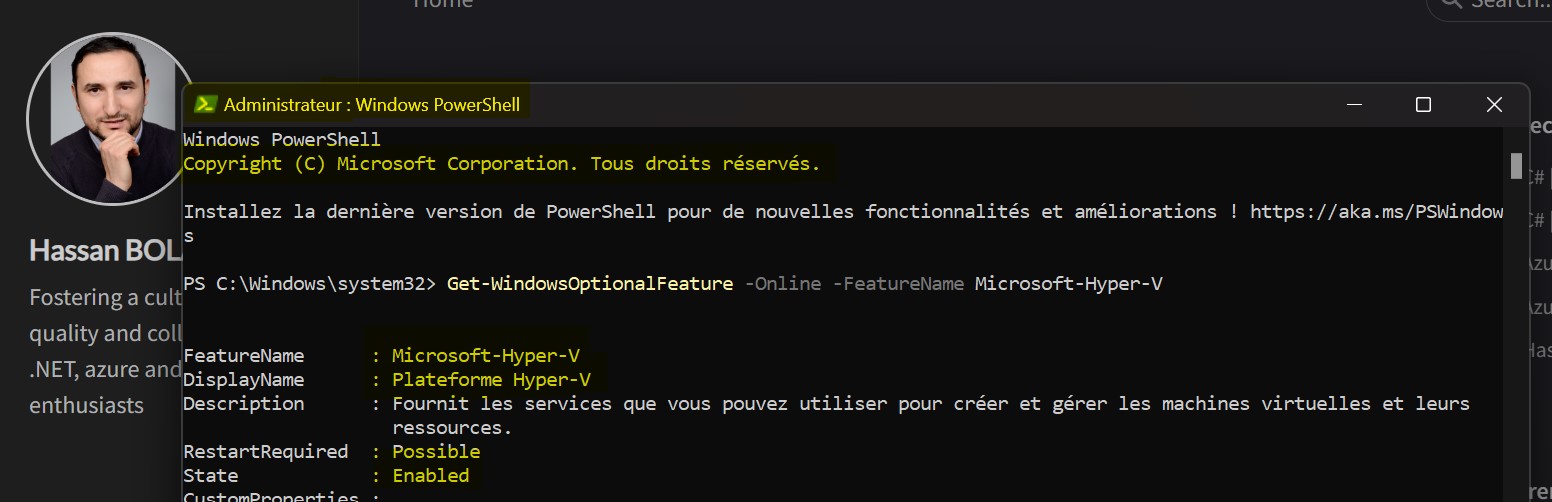
To verify that Hyper-V is installed, run the following command in PowerShell (as Administrator):
1
Get-WindowsOptionalFeature -Online -FeatureName Microsoft-Hyper-V
Note: If you’re using Docker with WSL 2, you can skip this step.
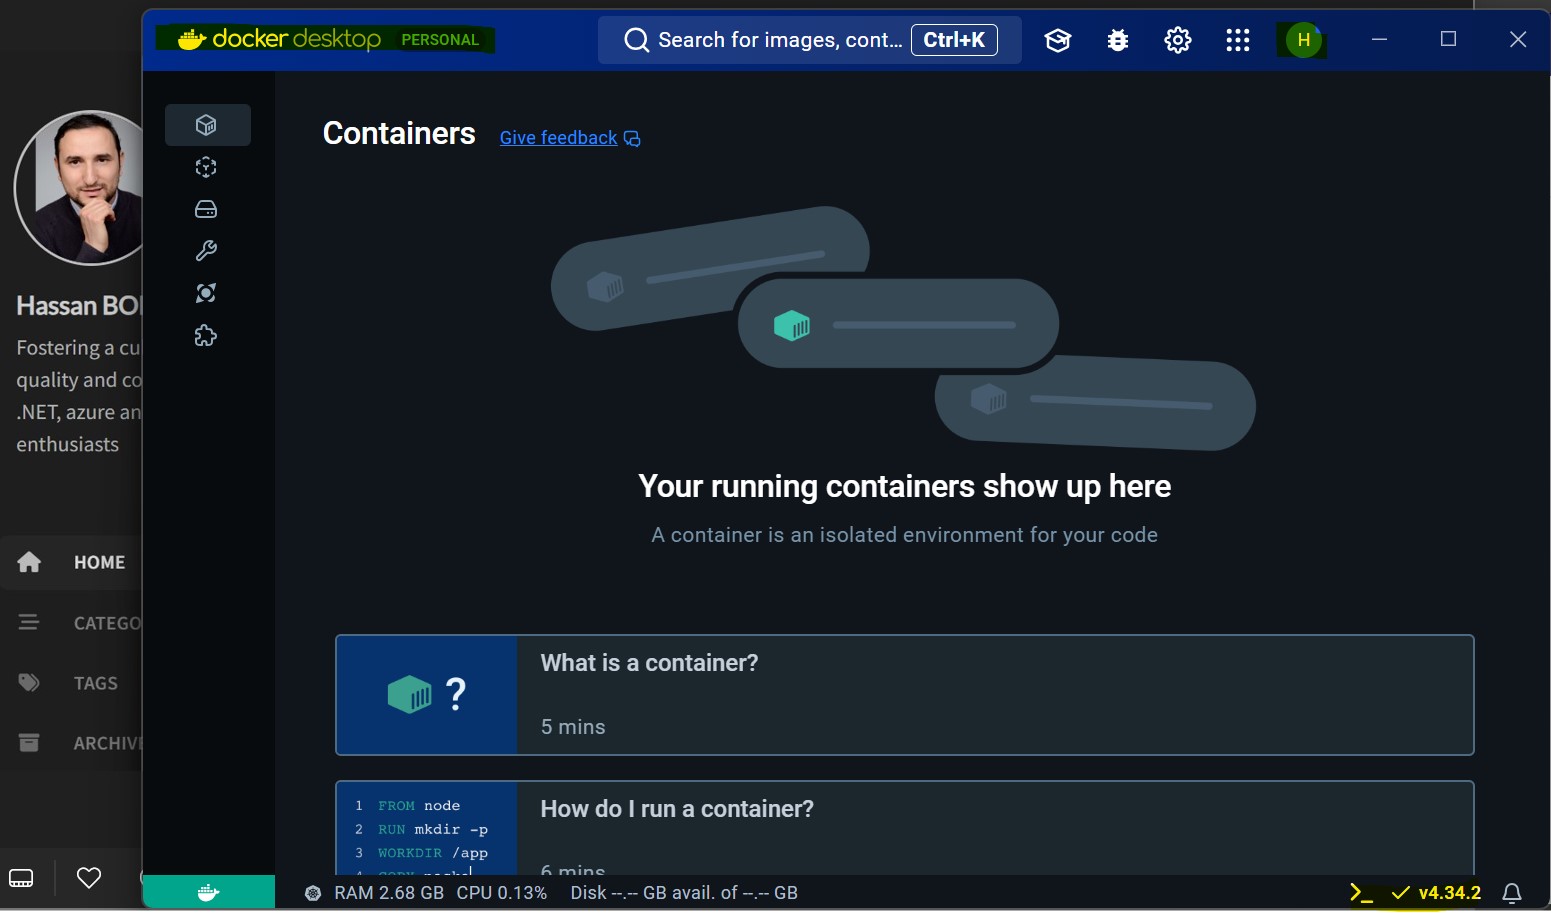
Step 2: Install Docker Desktop for Windows
- Download and install Docker Desktop on Windows. From my side I installed the version : 4.34.2
Step 3: Install Kubectl
- If Docker Desktop is already installed, Kubectl is also installed and added to the PATH.
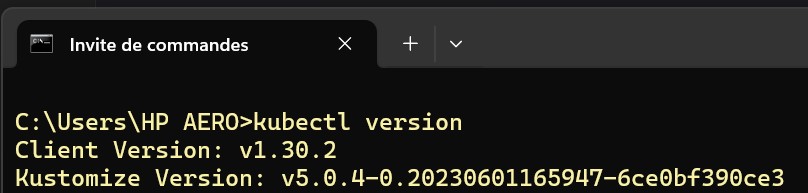
- Verify the installation by checking the Kubectl version:
1
 kubectl version
Step 4: Install Kubernetes on Windows
- Right-click on the Docker tray icon and select Settings.
- On the left panel, click Kubernetes.
- Enable Kubernetes and click Apply & Restart.
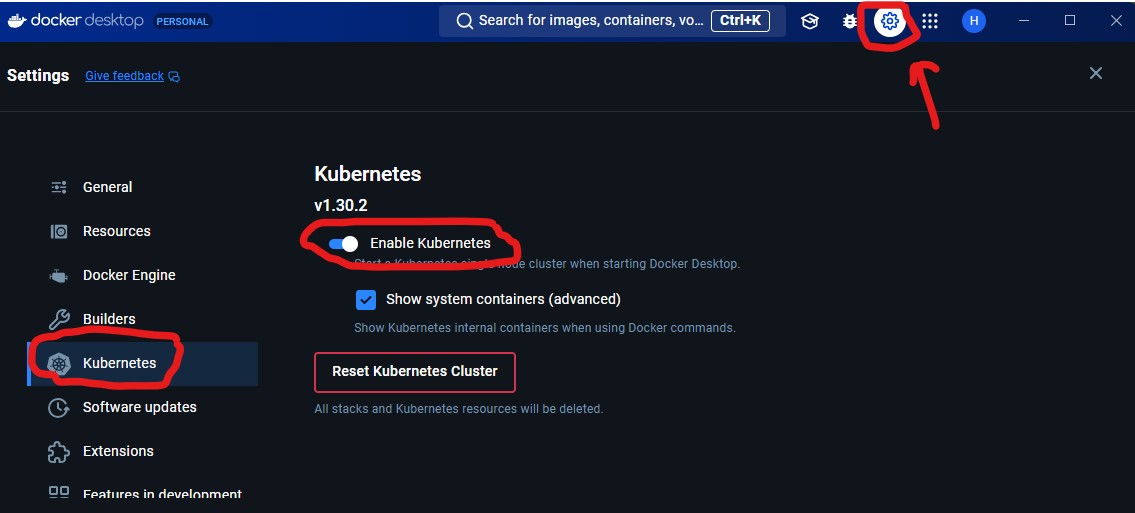
Note that : starting Kubernetes under Docker Desktop may take a few minutes to become fully operational. This is because Kubernetes requires several components to initialize, such as the control plane, etcd (the key-value store), and networking components.
Verify that Kubernetes is up and running using these commands:
1
2
3
4
docker info
kubectl cluster-info
docker container ls
kubectl get nodes
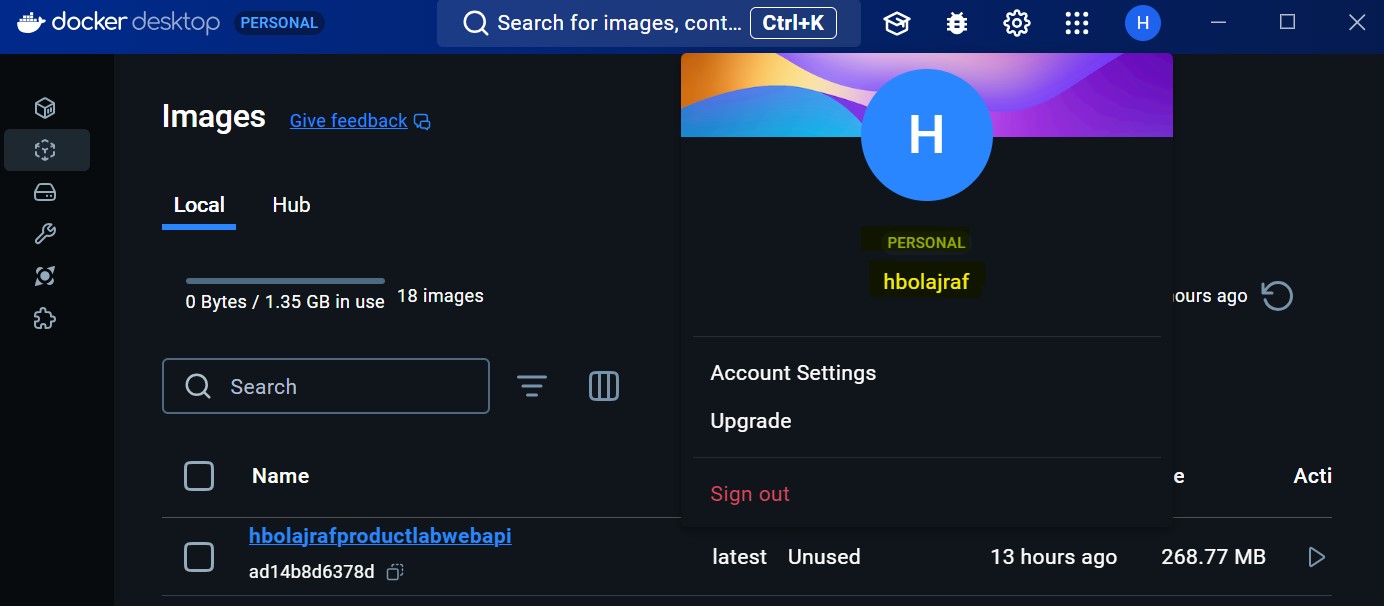
Step 5: Login to Docker Hub
- Create a free Docker Hub account at hub.docker.com.
- Log in from Docker Desktop or using the command:
1
 docker login
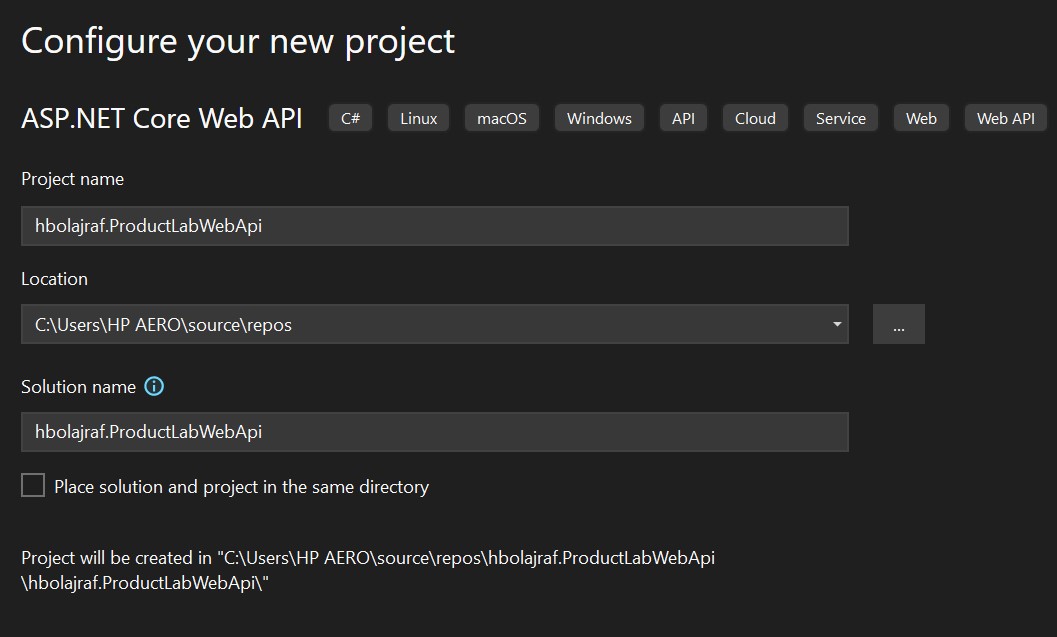
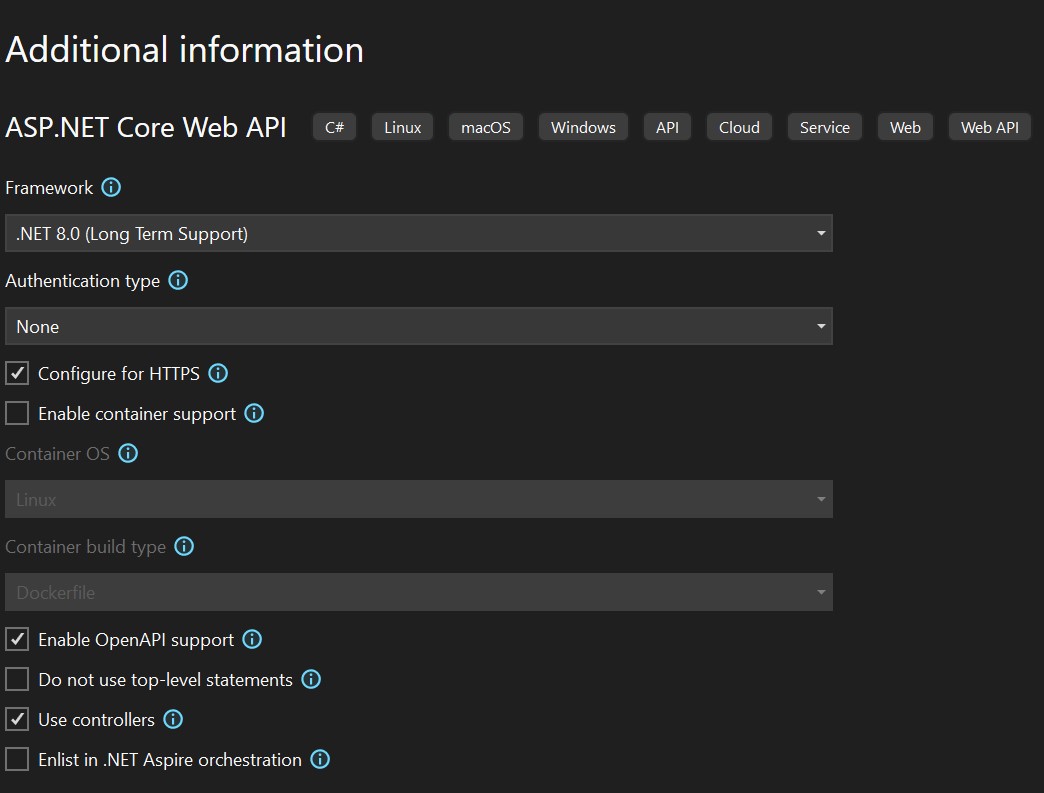
Step 6: Create an ASP.NET Core Web API Project
1.Open Visual Studio and create a Web API project named hbolajraf.ProductLabWebApi.
2.In the CatalogDbContext class, add in-memory data, so you don’t need a local SQL Server. Add the code as follows:
- Product Model (
Models/Product.cs)
1
2
3
4
5
6
7
8
9
10
11
12
13
using System.ComponentModel.DataAnnotations;

namespace hbolajraf.ProductLabWebApi.Model
{
    public class Product
    {
        public int Id { get; set; }
        public string Name { get; set; }
        public string Description { get; set; }
        public decimal Price { get; set; }
        public int AvailableStock { get; set; }
    }
}
- In-memory CatalogDbContext (
Data/CatalogDbContext.cs)
1
2
3
4
5
6
7
8
9
10
11
12
using hbolajraf.ProductLabWebApi.Model;
using Microsoft.EntityFrameworkCore;

namespace hbolajraf.ProductLabWebApi.DAL
{
    public class CatalogDbContext : DbContext
	{
		public CatalogDbContext(DbContextOptions<CatalogDbContext> options) : base(options) { }

		public DbSet<Product> Products { get; set; }
	}
}
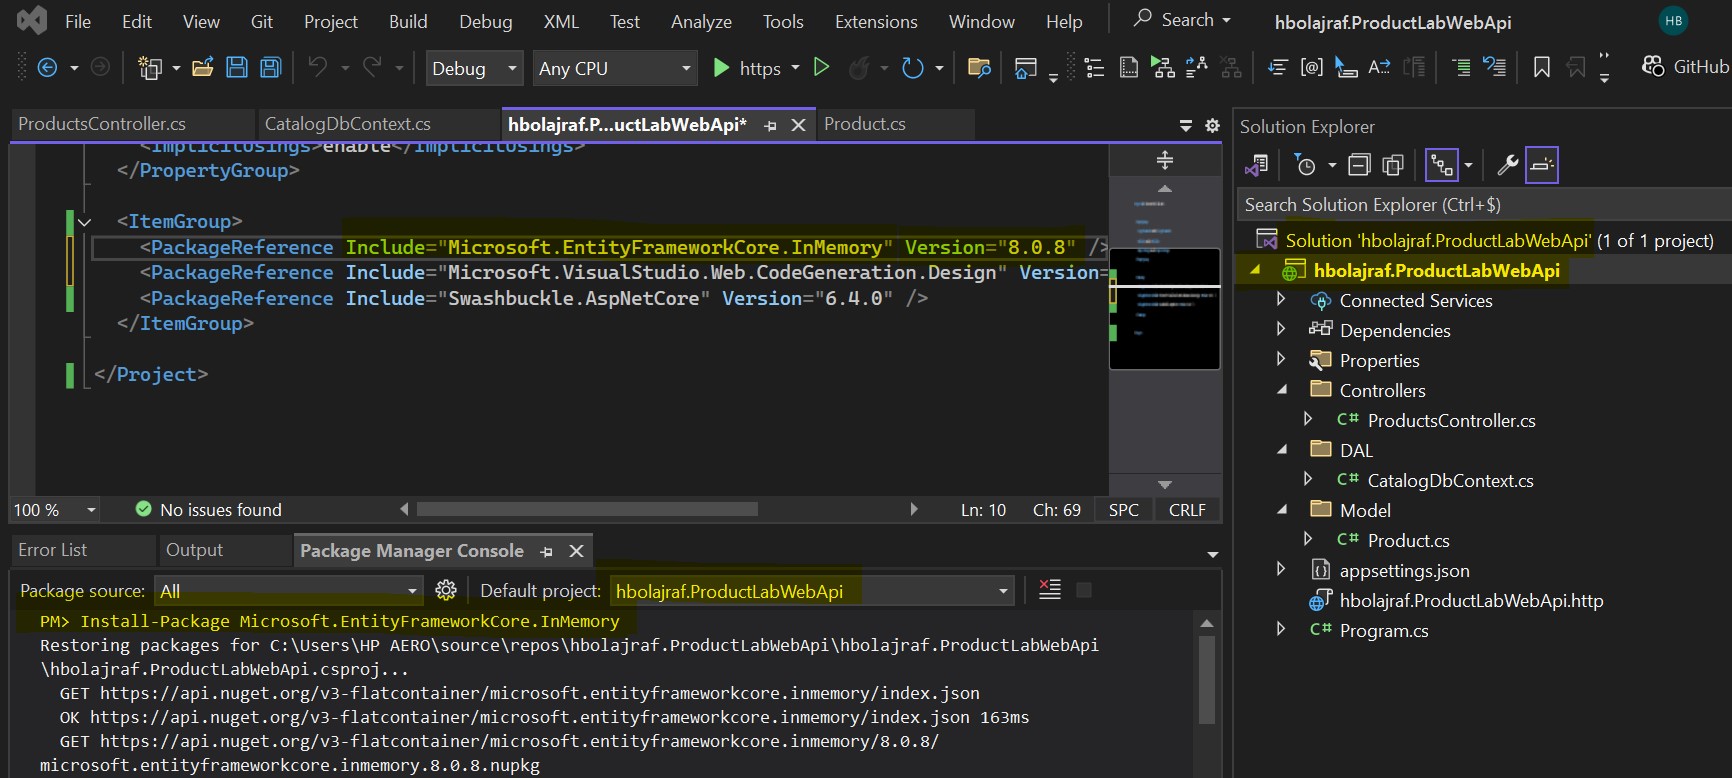
3.Add the following packages in the project via NuGet Package Manager:
1
   Install-Package Microsoft.EntityFrameworkCore.InMemory
4.Register the CatalogDbContext in the Startup.cs or Program.cs (depending on your project type):
1
2
services.AddDbContext<CatalogDbContext>(options =>
    options.UseInMemoryDatabase("CatalogDb"));
- Product Controller (
Controllers/ProductsController.cs)
1
2
3
4
5
6
7
8
9
10
11
12
13
14
15
16
17
18
19
20
21
22
23
24
25
26
27
28
29
30
31
32
33
using hbolajraf.ProductLabWebApi.DAL;
using hbolajraf.ProductLabWebApi.Model;
using Microsoft.AspNetCore.Mvc;
using Microsoft.EntityFrameworkCore;

namespace hbolajraf.ProductLabWebApi.Controllers
{
    [Route("api/[controller]")]
    [ApiController]
    public class ProductsController : ControllerBase
    {
        private readonly CatalogDbContext _context;

        public ProductsController(CatalogDbContext context)
        {
            _context = context;
        }

        [HttpGet]
        public async Task<ActionResult<IEnumerable<Product>>> GetProducts()
        {
            return await _context.Products.ToListAsync();
        }

        [HttpPost]
        public async Task<ActionResult<Product>> AddProduct(Product product)
        {
            _context.Products.Add(product);
            await _context.SaveChangesAsync();
            return CreatedAtAction(nameof(GetProducts), new { id = product.Id }, product);
        }
    }
}
Step 7: Create Dockerfile
-
Open Your Project in Visual Studio: Ensure that the project you want to add Docker support to is open.
-
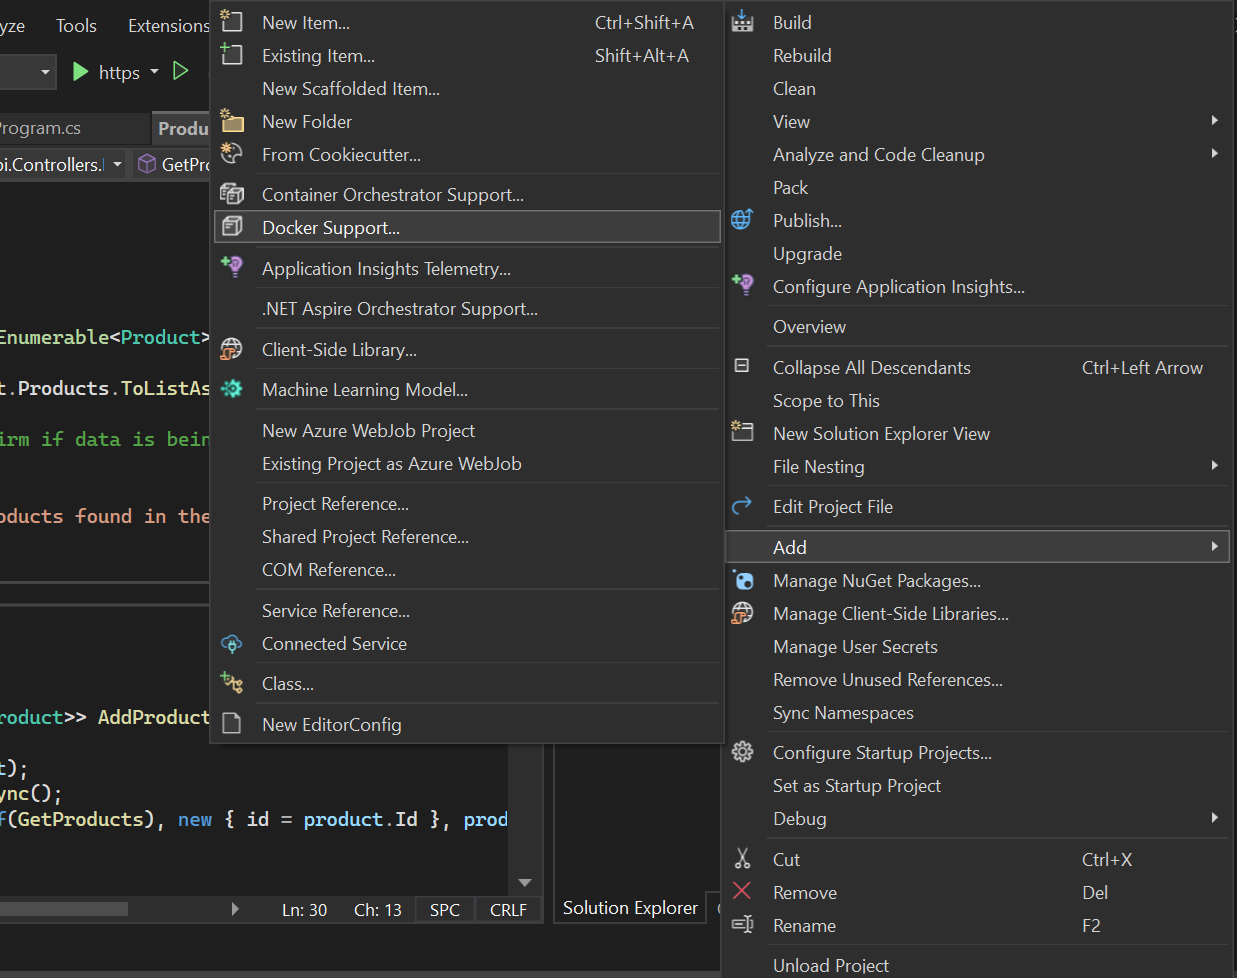
Right-Click on the Project Name: In the Solution Explorer, right-click on the project for which you want to add Docker support.
-
Select “Add”: From the context menu, hover over or click on Add.
-
Select “Docker Support”: From the submenu, select Docker Support. If this option is not available, ensure that you have the Docker tools installed in Visual Studio.
-
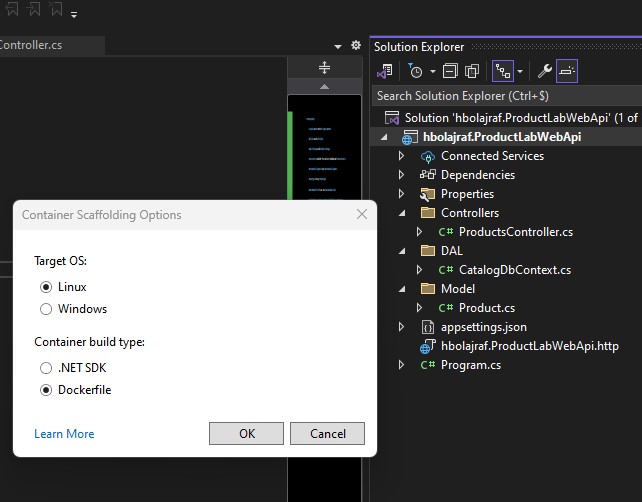
Choose the Target OS: A dialog box will appear asking you to select the target operating system for Docker.
-
Select Linux as the target OS. This will ensure that the Dockerfile created will be for Linux-based containers.
Dockerfile is Automatically Added: Visual Studio will now automatically generate a Linux-based Dockerfile in the project.
1
2
3
4
5
6
7
8
9
10
11
12
13
14
15
16
17
18
19
20
21
22
23
24
25
#See https://aka.ms/customizecontainer to learn how to customize your debug container and how Visual Studio uses this Dockerfile to build your images for faster debugging.

FROM mcr.microsoft.com/dotnet/aspnet:8.0 AS base
USER app
WORKDIR /app
EXPOSE 8080
EXPOSE 8081

FROM mcr.microsoft.com/dotnet/sdk:8.0 AS build
ARG BUILD_CONFIGURATION=Release
WORKDIR /src
COPY ["hbolajraf.ProductLabWebApi/hbolajraf.ProductLabWebApi.csproj", "hbolajraf.ProductLabWebApi/"]
RUN dotnet restore "./hbolajraf.ProductLabWebApi/hbolajraf.ProductLabWebApi.csproj"
COPY . .
WORKDIR "/src/hbolajraf.ProductLabWebApi"
RUN dotnet build "hbolajraf.ProductLabWebApi.csproj" -c $BUILD_CONFIGURATION -o /app/build

FROM build AS publish
ARG BUILD_CONFIGURATION=Release
RUN dotnet publish "hbolajraf.ProductLabWebApi.csproj" -c $BUILD_CONFIGURATION -o /app/publish /p:UseAppHost=false

FROM base AS final
WORKDIR /app
COPY --from=publish /app/publish .
ENTRYPOINT ["dotnet", "hbolajraf.ProductLabWebApi.dll"]
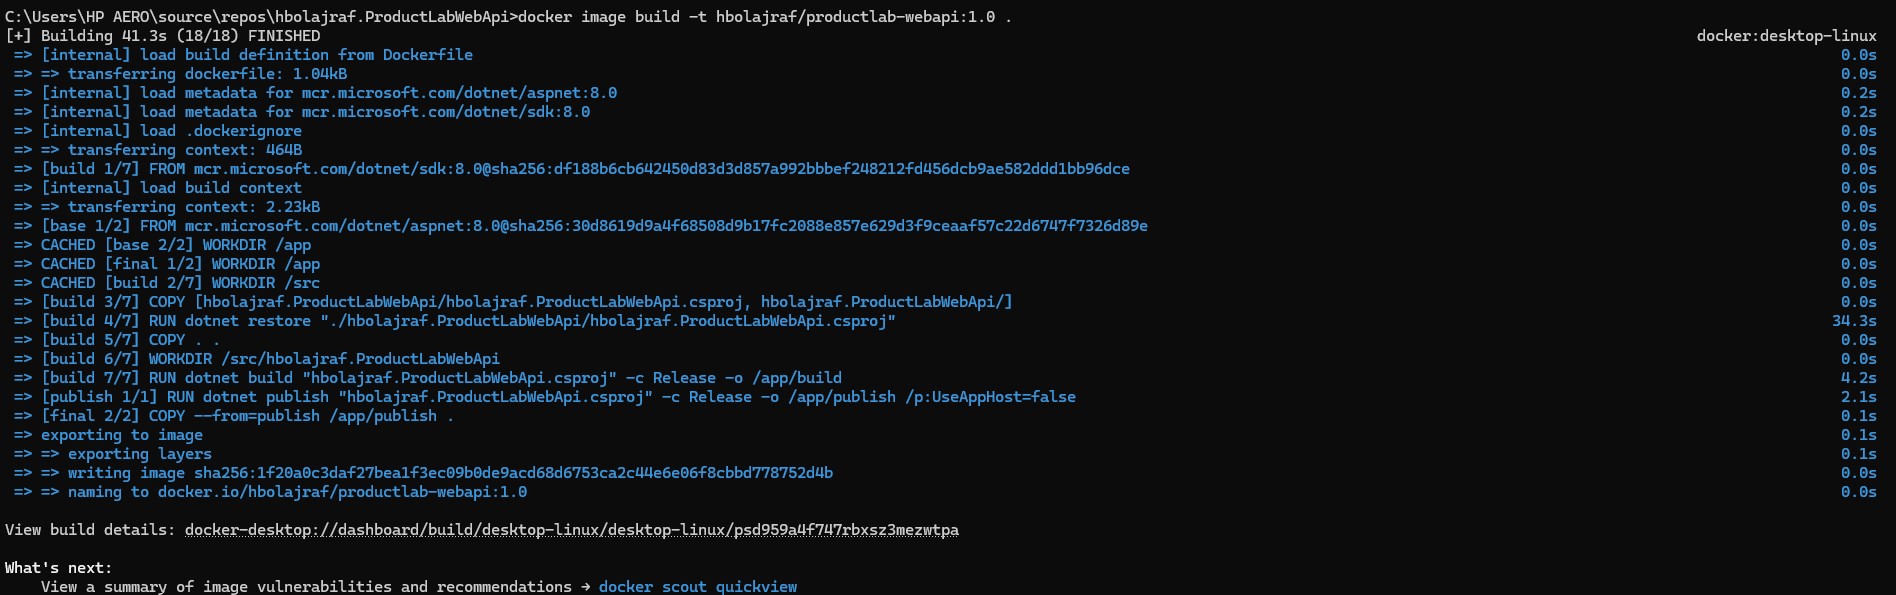
Step 8: Build and Push the Docker Image
1.Build the Docker image:
bash
    docker image build -t /productlab-webapi:1.0 .
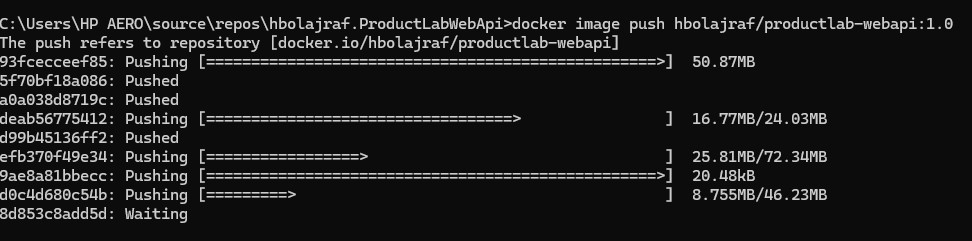
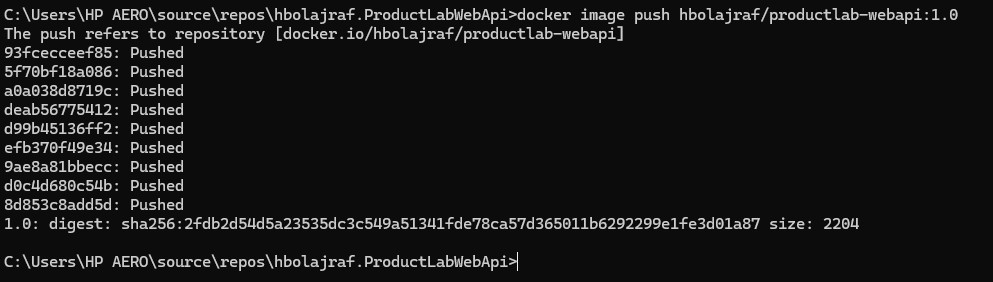
2.Push the image to Docker Hub:
bash
    docker image push /productlab-webapi:1.0
- Push in progress :
- Push Done :
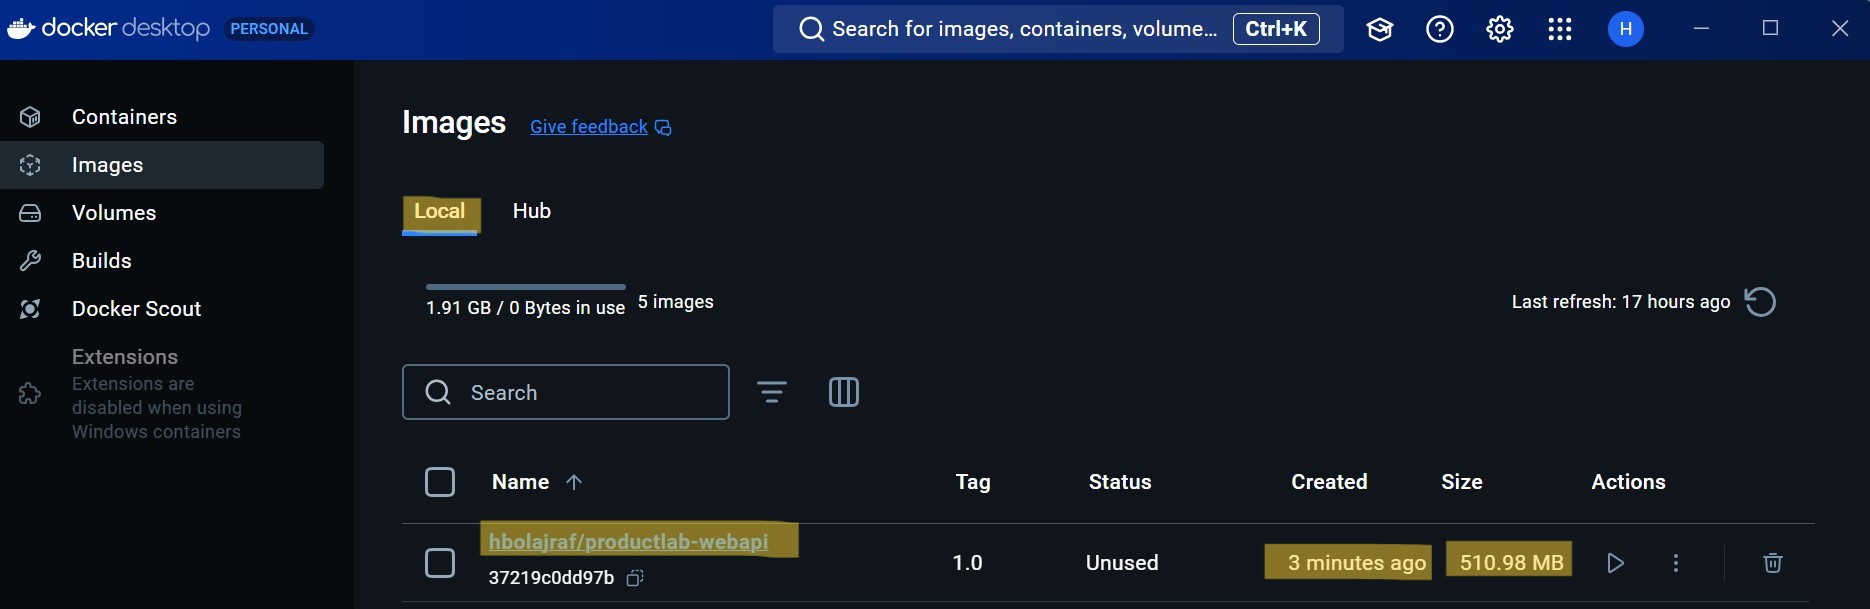
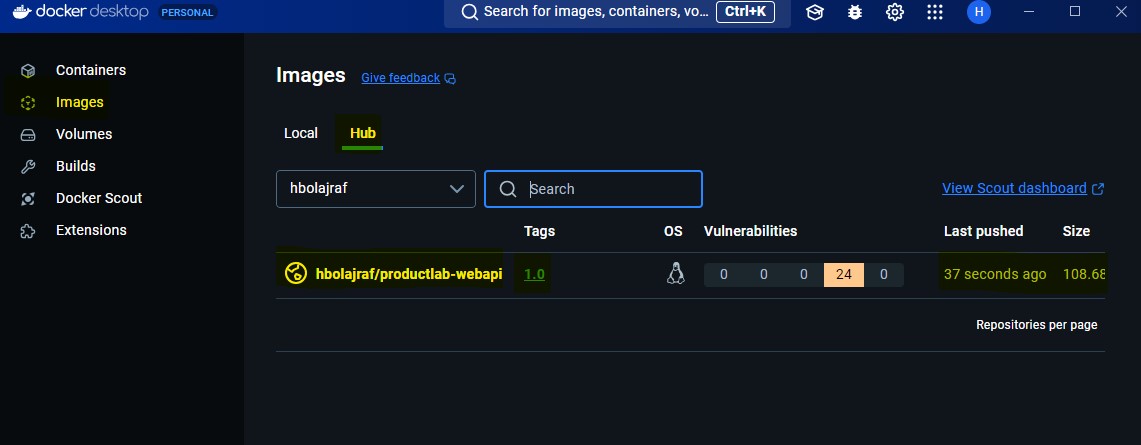
3.Docker desktop side : Using Docker Desktop, you can verify that the image has been pushed both locally (on Docker Desktop) and remotely (on Docker Hub).
Step 9: Configure Kubernetes Pod
1.Create a pod manifest file pod.yml:
1
2
3
4
5
6
7
8
9
10
11
12
apiVersion: v1
kind: Pod
metadata:
  name: productlab-pod
  labels:
    app: productlab-webapi
spec:
  containers:
    - name: productlab-container
      image: hbolajraf/productlab-webapi:1.0
      ports:
        - containerPort: 80
2.Apply the pod configuration:
bash
    kubectl apply -f pod.yml

The screenshot shows the status as ‘unchanged’ because I missed capturing the one with ‘created.’ Therefore, I re-executed the command :=)
3.Check the status of the pod:
bash
    kubectl get pods --watch

Step 10: Expose the Kubernetes Service
- Create and expose a service for the pod:
1
2
3
4
5
6
7
8
9
10
11
12
apiVersion: v1
kind: Service
metadata:
  name: productlab-svc
spec:
  selector:
    app: productlab-webapi
  ports:
    - protocol: TCP
      port: 8011
      targetPort: 8011
  type: NodePort
Expose a service :
bash
    kubectl expose pod productlab-pod --name=productlab-svc --type=NodePort --port=80

- Check the services:
1
 kubectl get svc
- Note the exposed port and access the application:
1
 http://localhost:{NodePort}/api/products

Step 11: Access Deployed Application and Test Endpoints via Swagger
Once Swagger UI is loaded, you should see the list of available endpoints from your application by navigating to the correct URL (e.g., http://localhost/swagger/index.html).
Select any endpoint you want to test. Swagger will give you options to try out requests by sending different HTTP methods (GET, POST, PUT, DELETE, etc.).
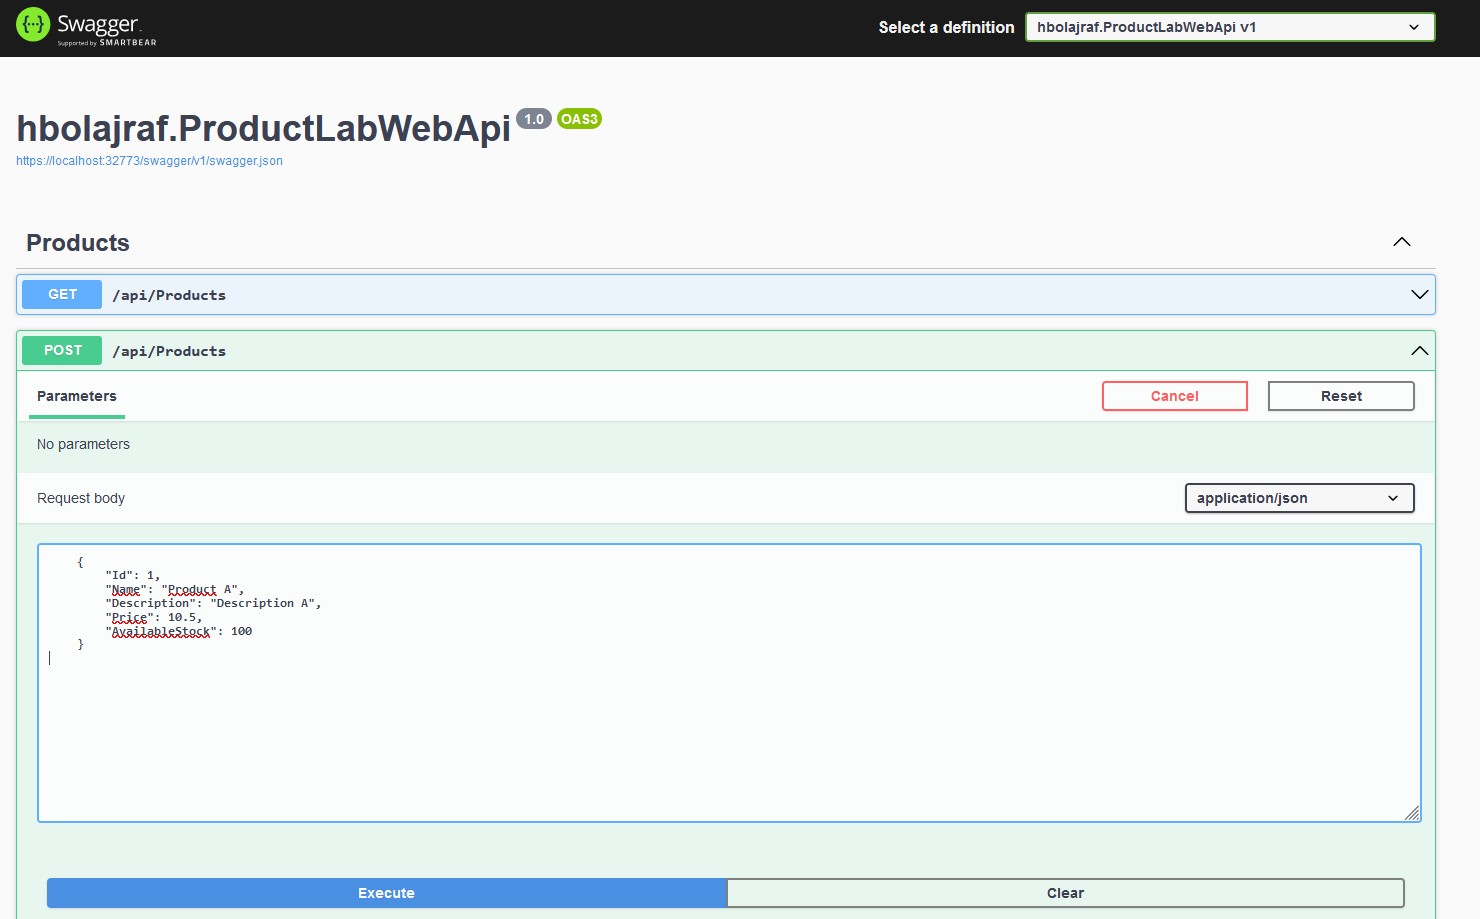
For example, you can test a POST request by clicking on the endpoint, entering any required parameters, and clicking “Try it out”.
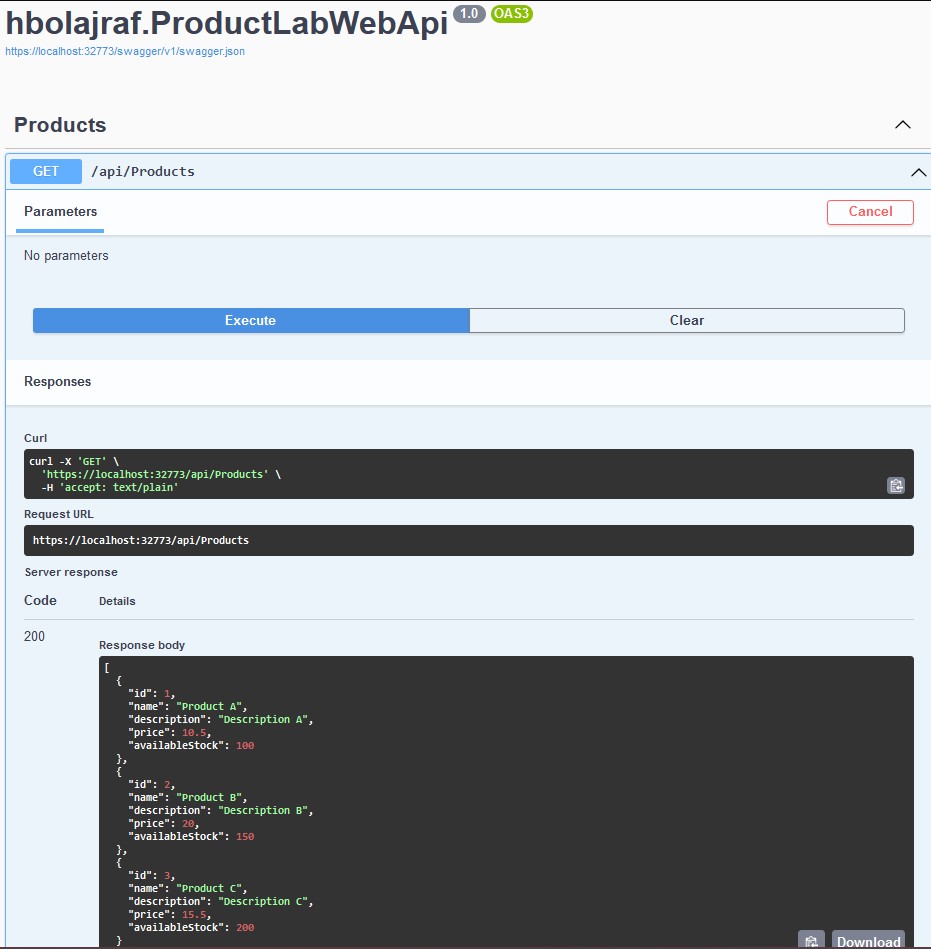
Swagger will display the response code, response body, and any relevant headers for the request.
1.Adding Products Using the POST Method :
2.Retrieve the created products using the GET method :
What Next?
This setup allows you to run a Kubernetes cluster locally, deploy an ASP.NET Core Web API using in-memory data, and expose it via Docker and Kubernetes, all without needing an external SQL Server. Happy coding!